HCDE532 » A Contact Form for Your Website
Now that we have gone thru the process of making a multiple page website, let’s add a contact form to our contact page, shall we?
View: http://faculty.washington.edu/sinkum/a-contact-form-for-your-website/contact.php
Code: https://github.com/msinkula/HCDE598/blob/master/a-contact-form-for-your-website/contact.php
Step One: Open & Prepare Your Contact Page
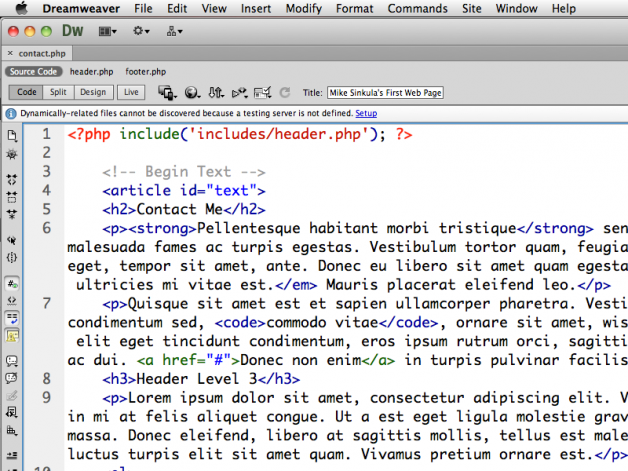
Go ahead and open your contact.php page to get started:
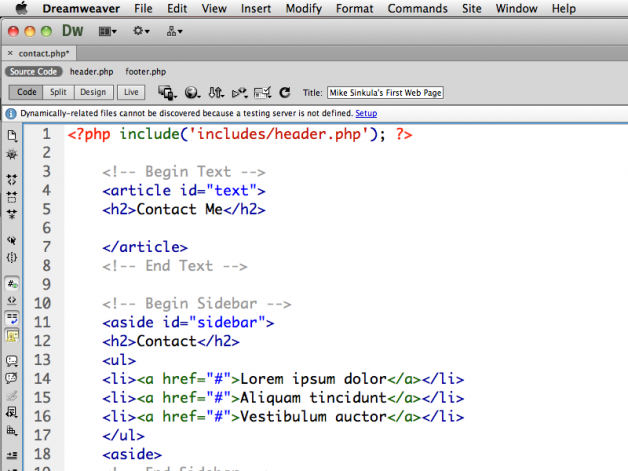
Right now, our contact page has some default text in it that we are going to get rid of:
This will make space for the form that we will place.
Step Two: Create the Form Element
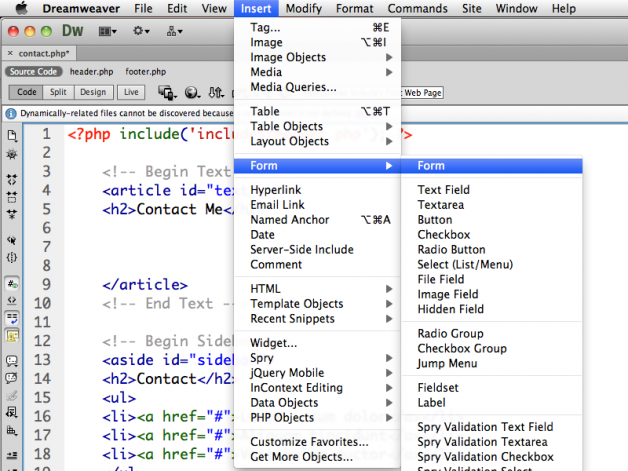
Let’s insert a form using Insert > Form > Form:
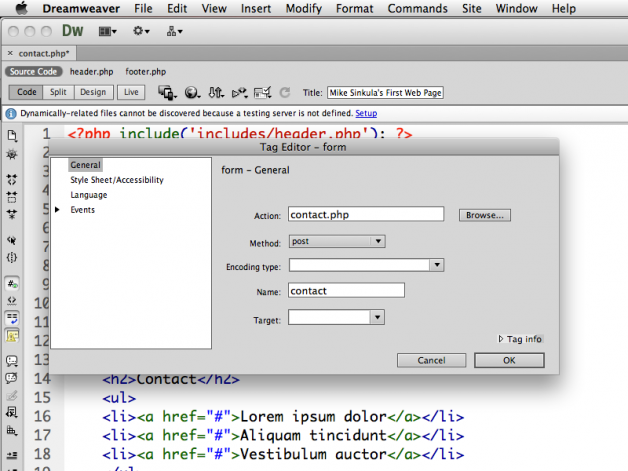
… and fill out the fields accordingly:
Here we are going to set the form action to contact.php and set the method to post.
See Also:
- HTML Form Tag | W3 Schools
- HTML Form Action Attribute | W3 Schools
- HTML Form Method Attribute | W3 Schools
We will also name our contact form.
Once you have done this, you should have a basic form element with the following information:
1 2 3 4 5 |
<!-- Begin Contact Form -->
<form action="contact.php" method="post" name="contact">

</form>
<!-- End Contact Form -->
|
I also like to put comments in to keep me organized.
Step Three: Create Your Form Elements
Let’s now create the actual form itself with all of its elements.
1. The Name Text Field
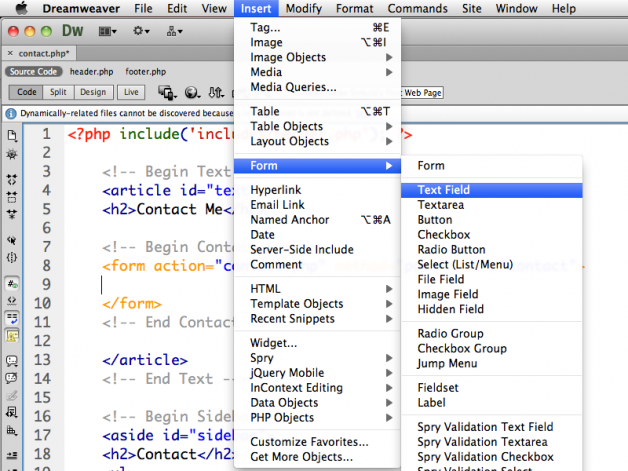
First and foremost we need to provide a field for the name of the person trying to contact us.
Let’s do this by Insert > Form > Text Field:
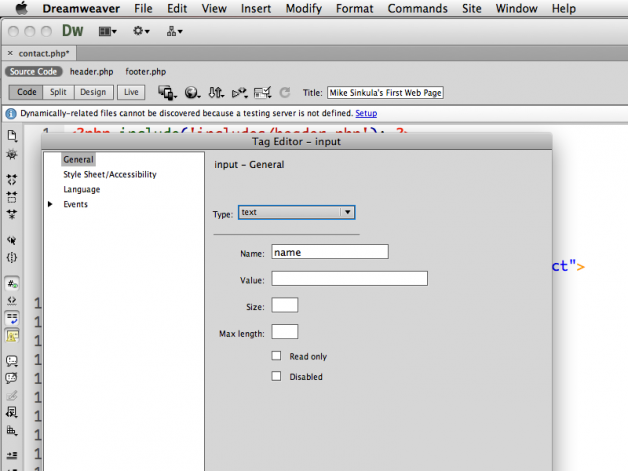
… and fill out the fields accordingly:
This will give us the form field for the person’s name:
1 2 3 4 5 |
<!-- Begin Contact Form -->
<form action="contact.php" method="post" name="contact">
<input name="name" type="text">
</form>
<!-- End Contact Form -->
|
See Also: HTML Input Tag | W3 Schools
Now we need to create a <label> for out <input>.
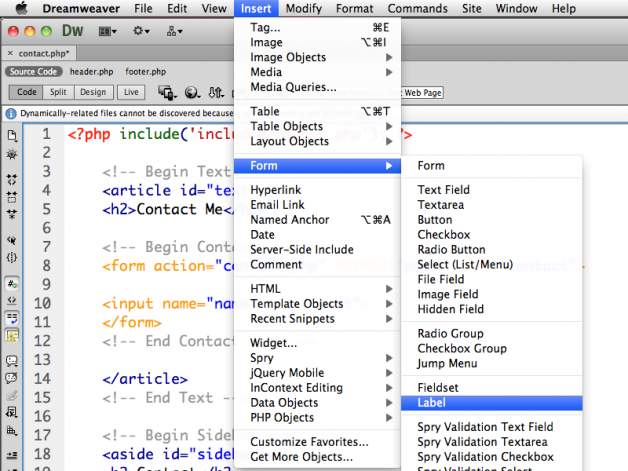
Let’s do this right above the <input> by choosing Insert > Form > Label:
When we do this, we should see our <label> tag:
1 2 3 4 5 6 |
<!-- Begin Contact Form -->
<form action="contact.php" method="post" name="contact">
<label></label>
<input name="name" type="text">
</form>
<!-- End Contact Form -->
|
See Also: HTML Label Tag | W3 Schools
But, unfortunately it is blank.
Let’s add a couple of things like the text that the user will see and a for attribute with the value of name:
1 2 3 4 5 6 |
<!-- Begin Contact Form -->
<form action="contact.php" method="post" name="contact">
<label for="name">Name:</label>
<input name="name" type="text">
</form>
<!-- End Contact Form -->
|
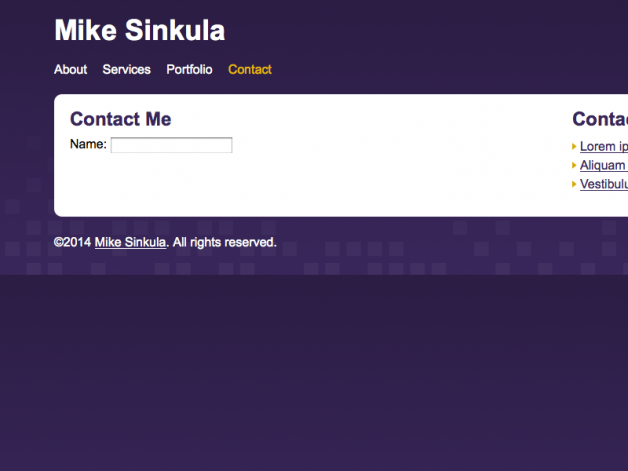
If we take a look now, we should see the start of our contact form:
2. The Email Text Field
For this one, you can either follow the steps above or just type it out:
1 2 3 4 5 6 7 8 |
<!-- Begin Contact Form -->
<form action="contact.php" method="post" name="contact">
<label for="name">Name:</label>
<input name="name" type="text">
<label for="email">Email:</label>
<input name="email" type="email">
</form>
<!-- End Contact Form -->
|
Note: we need to change the type to email on this one for validation purposes.
3. The Subject Select Menu
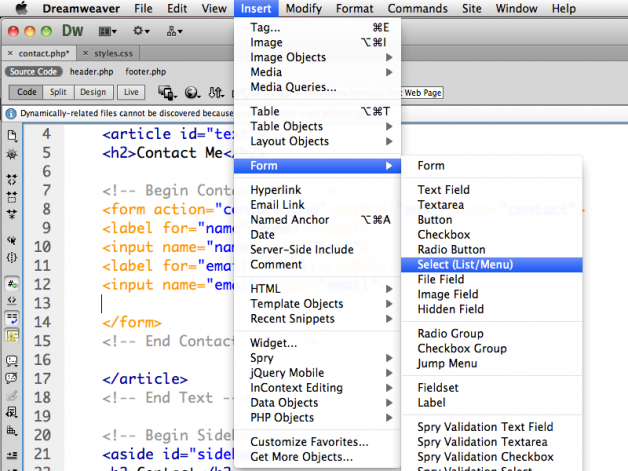
Let’s go ahead and create a multi-option select menu for our subject field by first choosing Insert > Form > Select (List/Menu):
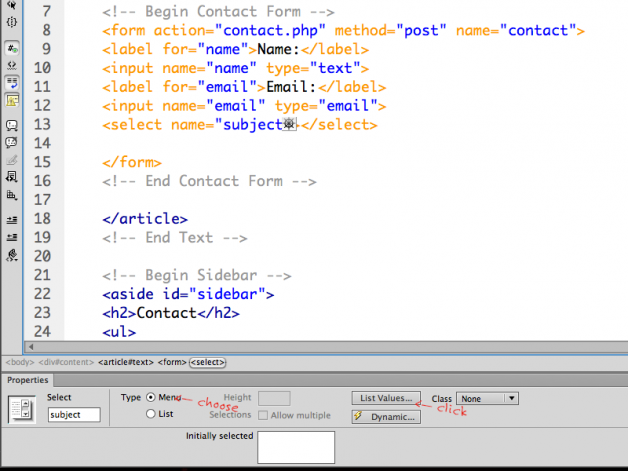
Once our initial menu is there we will need to create the options for the subjects.
See Also: HTML Select Tag | W3 Schools
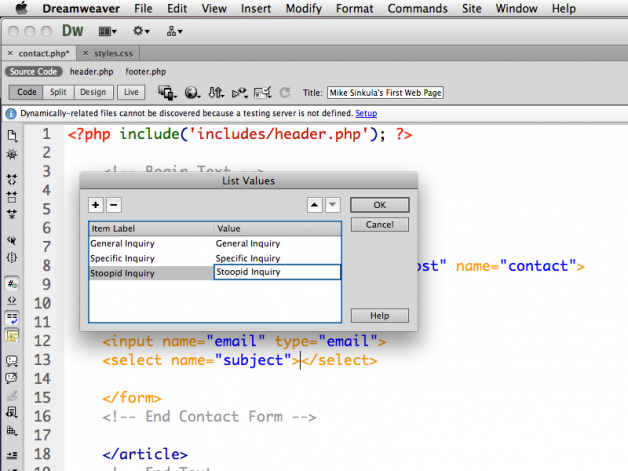
Create your option values:
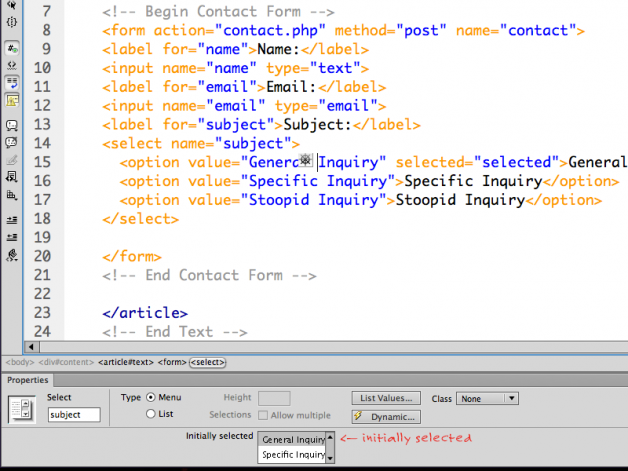
Choose the option that should be initially selected:
Create the <label> for the select menu:
1 2 3 4 5 6 7 8 9 10 11 12 13 14 |
<!-- Begin Contact Form -->
<form action="contact.php" method="post" name="contact">
<label for="name">Name:</label>
<input name="name" type="text">
<label for="email">Email:</label>
<input name="email" type="email">
<label for="subject">Subject:</label>
<select name="subject">
<option value="General Inquiry" selected="selected">General Inquiry</option>
<option value="Specific Inquiry">Specific Inquiry</option>
<option value="Stoopid Inquiry">Stoopid Inquiry</option>
</select>
</form>
<!-- End Contact Form -->
|
See Also: HTML Option Tag | W3 Schools
If we preview again, we will see our menu in play:
So, far our form is starting to take shape. However, we will need to style the form in a little bit.
For now, let’s just continue on.
4. The Message Text Field
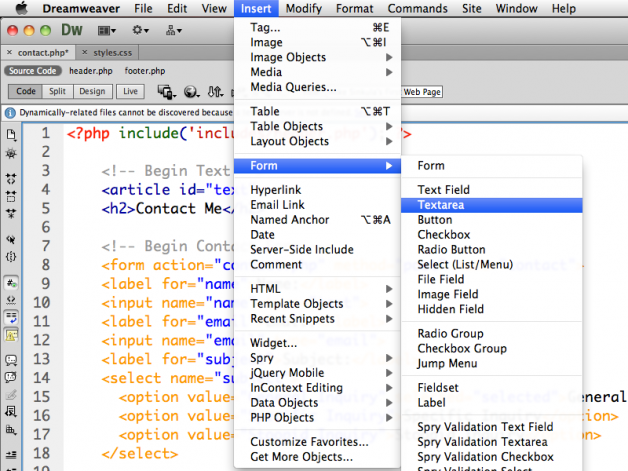
Since the whole point of a contact form is to send a message to a recipient, we need to create a message field below our <select> by going to Insert > Form > Text Area:
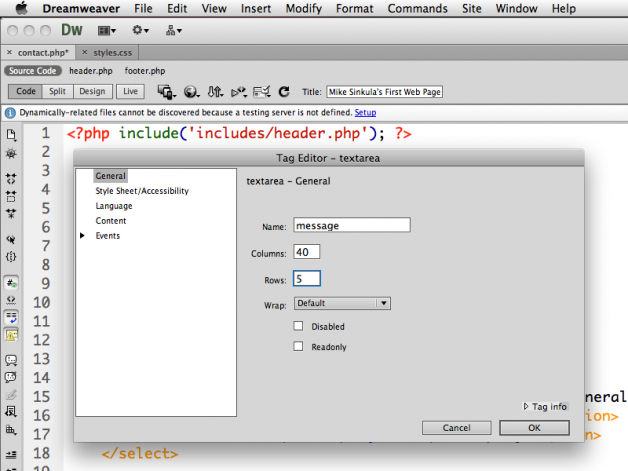
… give it the appropriate attributes:
… and lastly, give it a <label>:
1 2 3 4 5 6 7 8 9 10 11 12 13 14 15 16 |
<!-- Begin Contact Form -->
<form action="contact.php" method="post" name="contact">
<label for="name">Name:</label>
<input name="name" type="text">
<label for="email">Email:</label>
<input name="email" type="email">
<label for="subject">Subject:</label>
<select name="subject">
<option value="General Inquiry" selected="selected">General Inquiry</option>
<option value="Specific Inquiry">Specific Inquiry</option>
<option value="Stoopid Inquiry">Stoopid Inquiry</option>
</select>
<label for="message">Message:</label>
<textarea name="message" cols="40" rows="5"></textarea>
</form>
<!-- End Contact Form -->
|
See Also: HTML Textarea Tag | W3 Schools
5. The Submit Button
Almost done with our form elements.We now need to create a submit button that will control the form and send off the email.
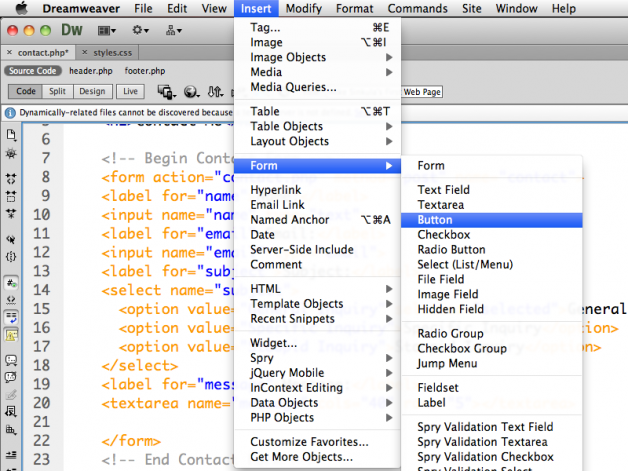
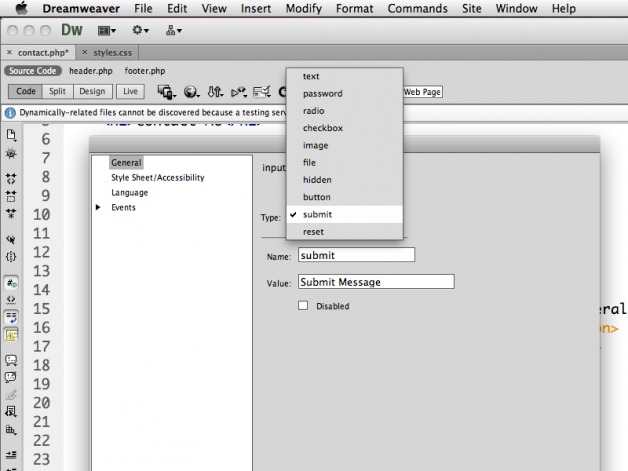
Let’s place the submit button after our <textarea> by going to Insert > Form > Button:
… and create the appropriate attributes:
We don’t need a label for this element:
1 2 3 4 5 6 7 8 9 10 11 12 13 14 15 16 17 |
<!-- Begin Contact Form -->
<form action="contact.php" method="post" name="contact">
<label for="name">Name:</label>
<input name="name" type="text">
<label for="email">Email:</label>
<input name="email" type="email">
<label for="subject">Subject:</label>
<select name="subject">
<option value="General Inquiry" selected="selected">General Inquiry</option>
<option value="Specific Inquiry">Specific Inquiry</option>
<option value="Stoopid Inquiry">Stoopid Inquiry</option>
</select>
<label for="message">Message:</label>
<textarea name="message" cols="40" rows="5"></textarea>
<input name="submit" type="submit" value="Submit Message">
</form>
<!-- End Contact Form -->
|
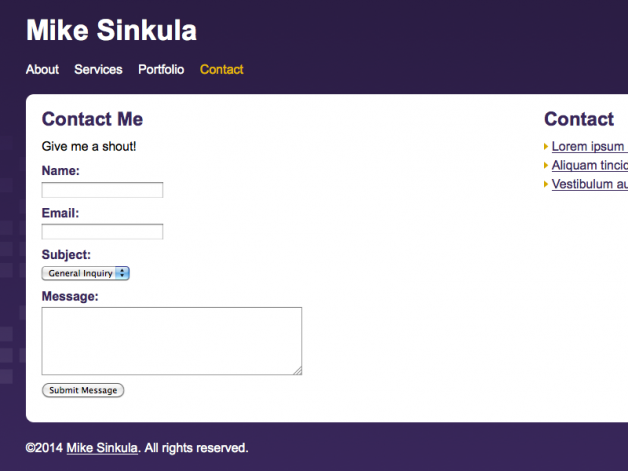
If we preview now, we can see all of our form elements in place. But they could definitely use some style.
Step Four: Style Your Form Elements
This step is going to be easy. The thing that is throwing our form all out of whack is that all of our elements in the form are inline elements.
Let’s change them to being block level elements in our style sheet and make them look a little better:
1 2 3 4 5 6 7 8 9 10 11 |
#text label {
display: block;
color: #39275B;
margin-bottom: 4px;
font-weight: bold;
}

#text input, #text select, #text textarea {
display: block;
margin-bottom: 10px;
}
|
That looks much better:
Notice that I also stuck in a <p> just above my form.
Step Five: Form Validation with HTML 5
This step is going to be wicked complicated.
We are going to need to mark some of our elements as required:
1 2 3 4 5 6 7 8 9 10 11 12 13 14 15 16 17 |
<!-- Begin Contact Form -->
<form action="contact.php" method="post" name="contact">
<label for="name">Name:</label>
<input name="name" type="text" required="required">
<label for="email">Email:</label>
<input name="email" type="email" required="required">
<label for="subject">Subject:</label>
<select name="subject">
<option value="General Inquiry" selected="selected">General Inquiry</option>
<option value="Specific Inquiry">Specific Inquiry</option>
<option value="Stoopid Inquiry">Stoopid Inquiry</option>
</select>
<label for="message">Message:</label>
<textarea name="message" cols="40" rows="5" required="required"></textarea>
<input name="submit" type="submit" value="Submit Message">
</form>
<!-- End Contact Form -->
|
See Also: HTML Button Tag | W3 Schools
Yup. That’s it. As long as we have specified a type attribute in our <input> tags, all we need to do is place in the required attribute to validate the form.
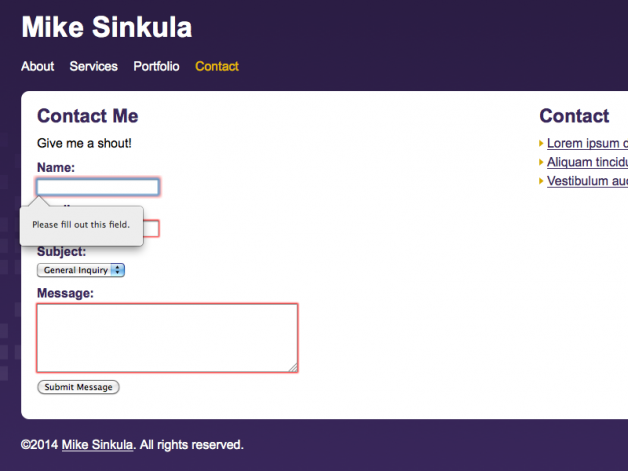
Let’s take a look:
Now that our form validates when we click on the submit button, it’s time to make the form actually send an email to us.
Step Six: The Form Handler Script
Here’s where we will put everything we’ve done so far to some good use.
In order to make this form work we will need to use a PHP script that will send us the email:
1 2 3 4 5 6 7 8 9 10 11 12 13 14 15 16 17 18 19 |
<?php // begin form handling script

if ( isset ($_POST['submit']) ) {  // if the submit button has been clicked

$mailRecipient = 'sinkum@uw.edu';  // send to this email address

$mailSubject = $_POST['subject'];  // use the subject from the select menu

$mailMessage = $_POST['message'];  // use the message from the message field

$mailSender = 'From:'.$_POST['email'];  // use the email from the email field

mail($mailRecipient, $mailSubject, $mailMessage, $mailSender);  // send the mail

print '<p>Your email has been sent, <strong>'.$_POST['name'].'</strong>!</p>'; // let the user know their email has been sent

}

?>
|
Here is where we need to make sure that all of the post variables match our form field names.
See Also:
- The $_POST Variable | PHP.net
- The isset Function | PHP.net
- String Operators | PHP.net
- The print Function | PHP.net
For example, the post call to submit the form:
… needs to match the name of our submit button:
This applies to all post variables within this script.
There is one value you will need to change in this script.
Please make sure that you change the destination email address to your own email address:
See Also: PHP Mail Function | PHP.net
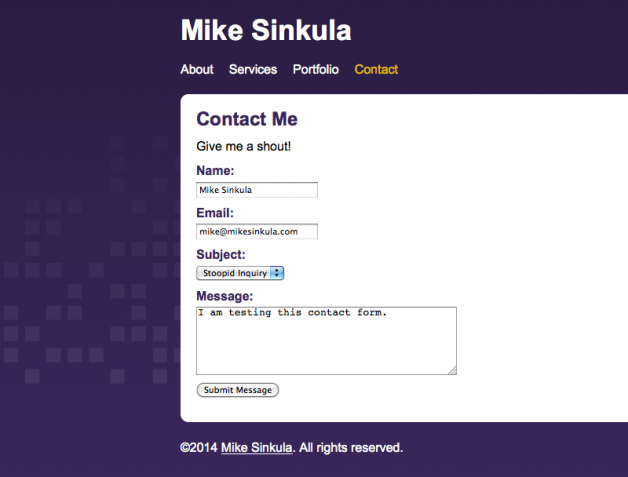
If this script is implemented correctly, when the form is filled out and submitted:
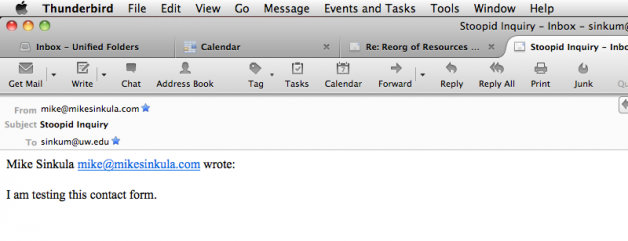
… you should successfully receive an email:
Congrats!!! You should now have a working contact form for your website!
Next, we will create a jQuery image slider for our home page.
This portion of the Premium Design Works website is written by Mike Sinkula for the Web Design & Development students at Seattle Central College and the Human Centered Design & Engineering students at the University of Washington.





Social