WEB200 » Managing Your Websites with Dreamweaver
Managing your websites with Dreamweaver is incredibly easy and very powerful. I use Dreamweaver to manage the site you are looking at right now.
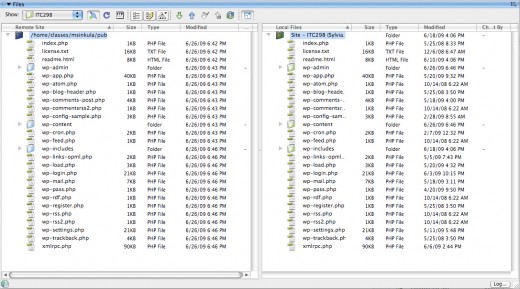
In this screen shot you can see all of my files via the Site Manager:
On the right, you can see my local files. On the left, you can see my remote files.
So, let’s get you up and running on using Dreamweaver to manage your sites too, shall we?
Step One: Open the Site Definition Dialogue Box
In order to set up a site to manage in Dreamweaver, you will need to open up the Site Manager via Site > New Site:
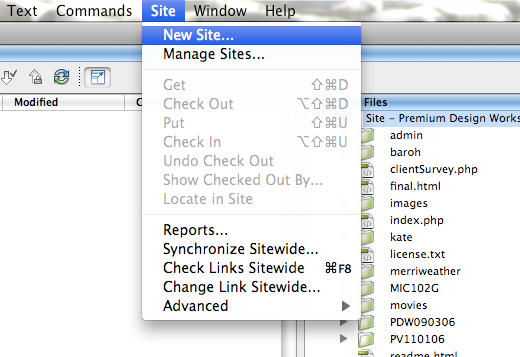
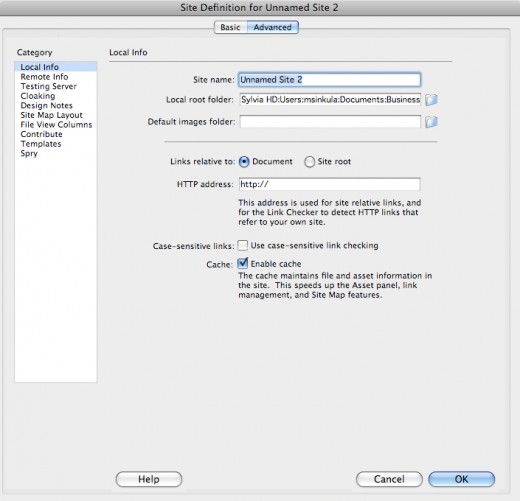
This will open the Site Definition dialogue box:
Here you will be able to:
- Name your site
- Choose the local root folder
- Log into your remote server via FTP
Step Two: Name Your Site
In this example I will be creating a Site Definition for my ITC298 class.
Therefore, I will name my Site “ITC298”:

Step Three: Choose Your Local Root Folder
Now I will need to select a “Local Root Folder.”
To do this I will need to click on the folder icon next to the “Local Root Folder” input field.
When I click the icon, I will then be able to choose the folder that my HTML files live in:
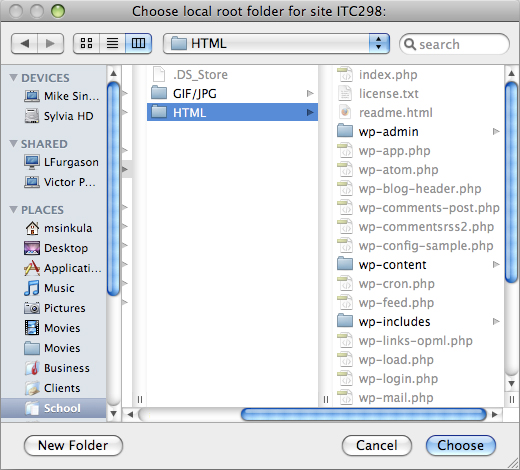
Typically my HTML files are in a folder named “HTML” that is in my project folder. That way I can be sure to upload only my HTML files (and files associated with them) to my server.
Step Four: Set Up Your Remote Information
After I have chosen the proper local folder, I will need to set up my remote information.
Select “Remote Info” in the category field and select “FTP” access:
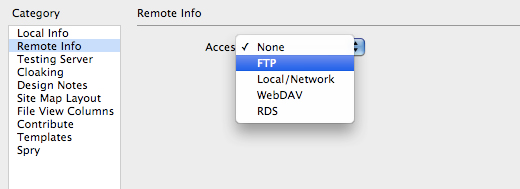
You can then input your site’s remote information:
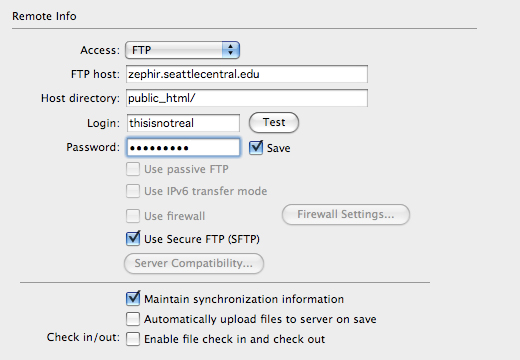
Typically, you will need to input your:
- FTP Host: typically this is the (remote) server where you will put your files
- Host Directory: the folder on your server where you will put your files
- Login/Username: this is your “username” for the account
- Password: this is your “password” for the account
In this case, I will also need to select the “Use Secure FTP” checkbox.
Step Five: Test Your Connection
Let’s click the “Test” button to see if it works:
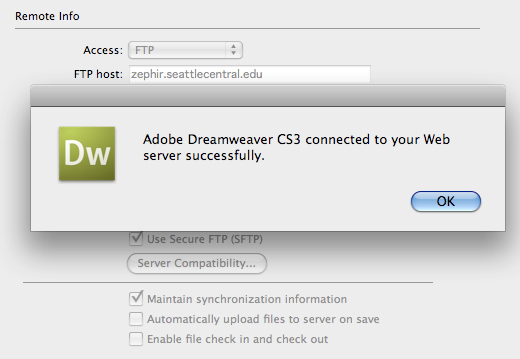
Success!
Step Six: SAVE!
Once you have tested your connection and hit the “OK” button, you should see your new site in your Manage Sites dialogue box:
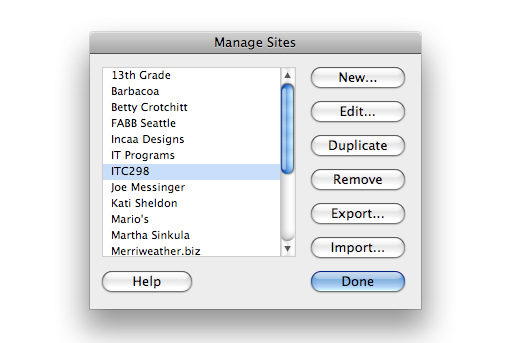
Click the “Done” button to save your site information.
Step Seven: Connect & Upload
If you do not see your files, you will need to open the files window via Window > Files:
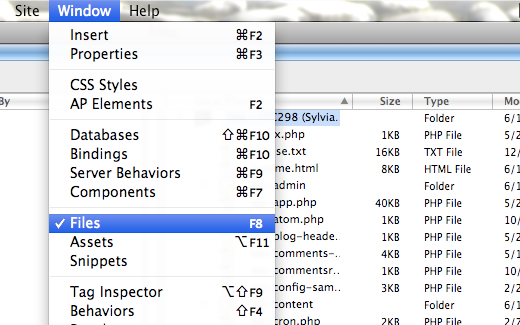
Once you open your Files Window, you may not see your remote files.
To see both local & remote files, click the “expand to see local and remote files” button:

Now you need to connect to your server by clicking the “connect to remote host” button:

Once you are connected, you can “synchronize” your site files by right clicking on your local folder:
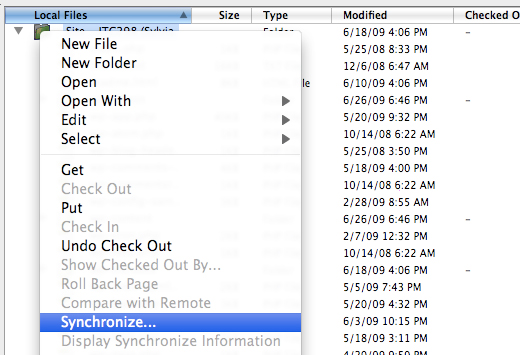
“Synchronizing” your files will allow you to easily put all of the files to your server that aren’t there or that you have updated.
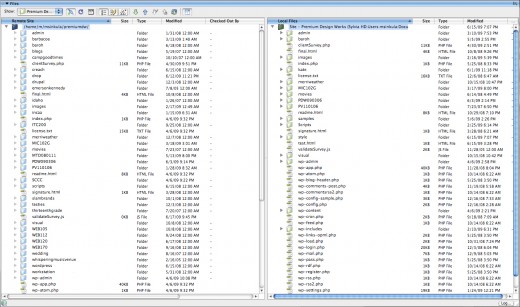
You should now see all of your files on your remote server:
Step Seven: Export Your Site Information
You should backup your site’s information (and local files) on a jump drive if you are a student working from other computers than your own.
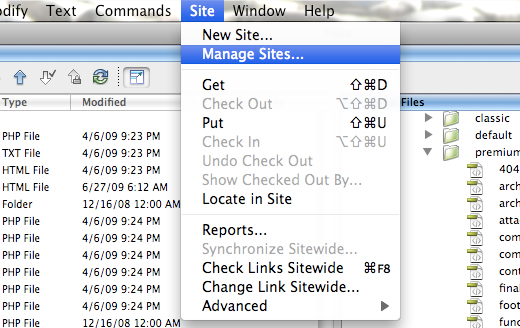
To export a backup you need to open the Site Manager via Site > Manage Sites:
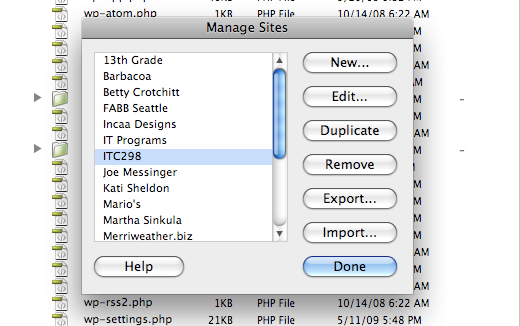
Once in the Site Manager, click the “Export…” button:
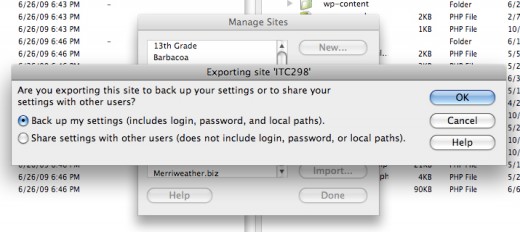
Choose to back up your settings and click the “OK” button:
You will be asked where you want to save your site information (.ste) file:
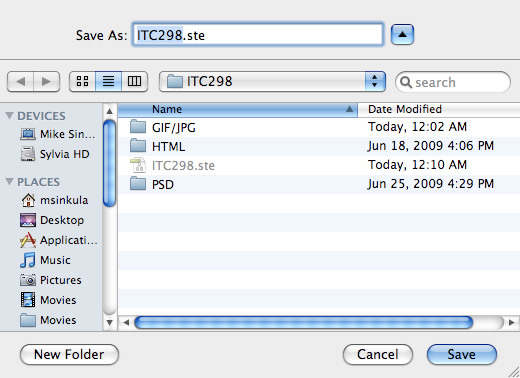
You should probably save it in your project folder.
Now, every time you are at a new computer you can “import” you site information (.ste) file from the Site Manager.
Open the Site Manager via Site > Manage Sites and click the “Import…” button this time:

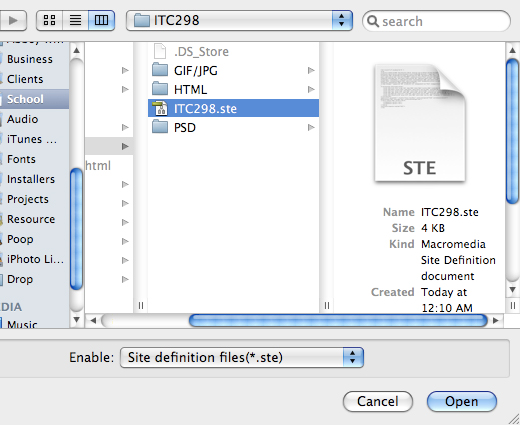
Find your site information (.ste) file and click the “Open” button:
Click the “Done” button:

You will now see your site files and be able to connect to your remote host:
Congratulations!! You now know how to manage your sites with Dreamweaver!
This portion of the Premium Design Works website is written by Mike Sinkula for the Web Design & Development students at Seattle Central College and the Human Centered Design & Engineering students at the University of Washington.


9 Comments:
tanx for the knowledge love it.
Thank you for making each step so clear!
good info
Very helpful. thanks
God help me, I put aside a whole atfneoron to figure this out.
Did this help?
Dreamweaver has been for a while my personal goto application for years. I truly don’t know what I would do with out it. There were moments when I initially started off using the software, and I thought it was way too sophisticated. Now I fly around it, and it has become an asset in my personal tool box. Anyway many thanks for the information.
hi mike
please don’t ever take these down. i started really looking through these tutorials and such and they are invaluable (i just bought a domain name/site/etc.). i won’t have you next quarter but want to be able to access these. thanks.
Like I said, Joseph. This site should be up for at least three years after I die.
I am glad you find them useful.
Trackbacks: