WEB170 » Installing WordPress to Your Server
Setting up WordPress on your own server is incredibly easy and is the best way to go.
Step One: Download the WordPress Application
For this step, we will need to visit http://wordpress.org/download/:

Download WordPress Meow!
Once there, you will simply need to download the zip file.
You should see a ‘wordpress-x.x.zip’ file where ever you chose to save it:

Download the WordPress Zip File
Go ahead and extract the zip file.
Once extracted, you will see all of the HTML files associated with WordPress:

Extract the WordPress Zip File
Note: Delete the zip file after you have extracted it.
Step Two: Upload WordPress to Your Server
Next, you will need to upload the WordPress files to your server:

Upload the WordPress Files to Your Server
See Also: Managing Your Websites with Dreamweaver | Premium Design Works
Once you have uploaded all of your files to your server, you will need to connect WordPress to your MySQL database.
Open the “wp-config-sample.php” file:
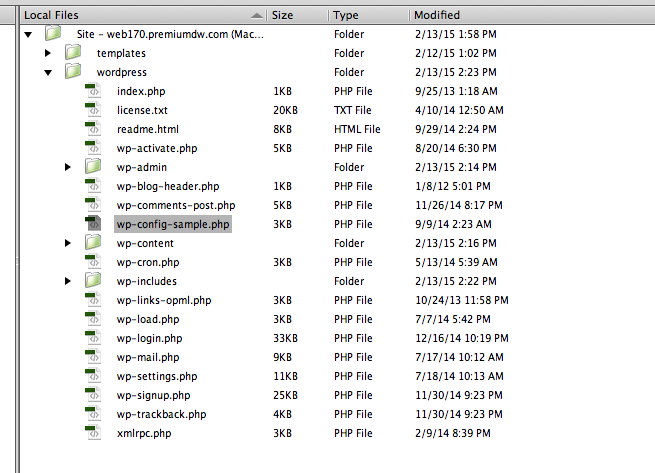
Open the Sample Configuration File
Once opened, you will need to set it to point to your database:

Sample Database Configuration File
You will need to define your:
- DB_NAME: the name of your database
- DB_USER: the username associated with your database
- DB_PASSWORD: the password associated with your database
- DB_HOST: the host name of your database
Hopefully you are using DreamHost: https://panel.dreamhost.com/index.cgi?tree=goodies.mysql&
Once you have defined your settings, save the file as “wp-config.php” in your site folder:
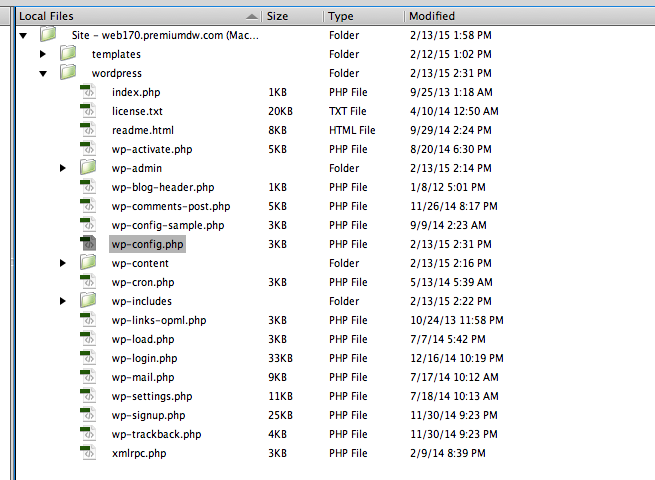
Database Configuration File
Now, upload this file to your server.
When you visit the URL of your website now, you will be asked to install the WordPress tables to your database:

Welcome to the famous five-minute WordPress installation process!
You will also be asked to name your blog and enter your e-mail address.
When you click the “Install WordPress” button, you will be given your first Username & Password:

WordPress has been installed!
Step Three: Log In
Enter your Username & Password and click the “Log In” button:

Login to Your New WordPress Site!
You will now be taken to the WordPress Dashboard:

Welcome to Your WordPress Dashboard!
Step Four: Edit Your Profile
Go to Users > Your Profile and fill out your profile information:

Edit Your User Profile
Here you can specify your name and how it will be displayed on your site, your e-mail address (for administrative purposes), other personal information, and personal options.
See Also: http://codex.wordpress.org/Your_Profile_SubPanel
Don’t forget to click the “Update Profile” button!
This portion of the Premium Design Works website is written by Mike Sinkula for the Web Design & Development students at Seattle Central College and the Human Centered Design & Engineering students at the University of Washington.


6 Comments:
Mike –
I edited the link you asked me to edit so the image now opens the link in a new tab. Sorry for the delay…but better late than never, right? =0)
If you change your permalinks, you may be informend ever so politely (aka snarky, but gotta love it) by WordPress that you need to update your .htacess file because it’s not writable.
Unfortunately the .htaccess file was “hidden” so I wasn’t able to find it. This was because my site is hosted by GoDaddy, and because my computer was hiding them too… But I figured it out…
I have a linux hosting account with GoDaddy, and they don’t automatically let people see the .htaccess file. To fix that, I went into my hosting account at GoDaddy and under hosting control center > settings > file extensions, I added .htaccess as an extension readable by PHP5x, that “enabled it” or un-hided it. (love my grammer – for all you pedantics)
Then, I had to enable my computer to let me see the files once I had access to them. On the MAC I used command line, but if you install “secrets” you will then have the option in your finder to tell your Mac to show your hidden files. (along with all sort of other really cool s**t) Here’s the link to secrets:
http://secrets.blacktree.com/
Here’s the link to where I found the tips on showing hidden file on my mac:
http://www.mactricksandtips.com/2008/04/show-hidden-files.html
good luck
Deb
You may need to update the tutorial to include adding the security keys. I think this feature is fairly new.
http://codex.wordpress.org/Editing_wp-config.php#Security_Keys
Trackbacks:
[…] Blog! Search engines like regularly updated websites and a blog allows you to do just that. Plus it positions you (and any other writers in your organization) as experts in your field. Also, it’s searchable content. It allows you to show for keywords in the search engines that aren’t strictly services you offer, but on topics pertaining to your industry. Blogging gives an avenue for outreach efforts to gain links back to our website. You can pitch a blog post, or a guest posting opportunity to any company or organization that would find what you are writing about useful. And their website might have a lot more traffic than yours; exposing your company to a larger audience you may not have had the chance to reach otherwise. We used a WordPress blog and incorporated it into its own page on our website, installing the wordpress files on our server. […]