WEB170 » Setting Up & Customizing WordPress Options
Now that you have installed WordPress to your server, you will want to customize how it works for you.
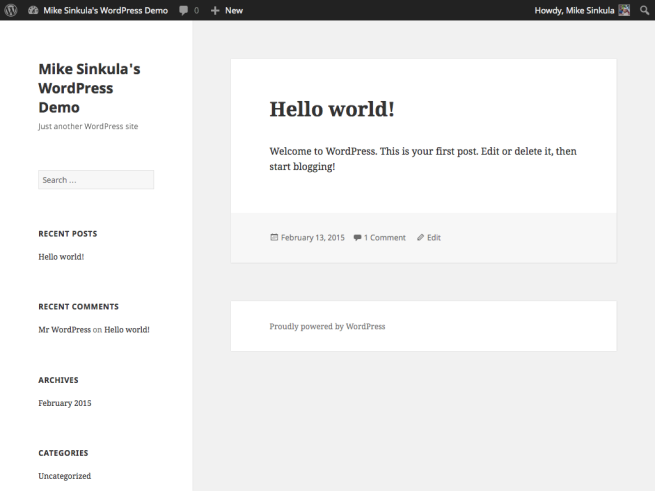
When you visit your site for the first time you should see the default theme:
Eventually we will want to create and customize our own theme. But for now, let’s worry about setting up and customizing some of our basic options inside the WordPress administration panel.
Step One: Log In To WordPress
The first thing we need to do is “log in” so we can change our settings.
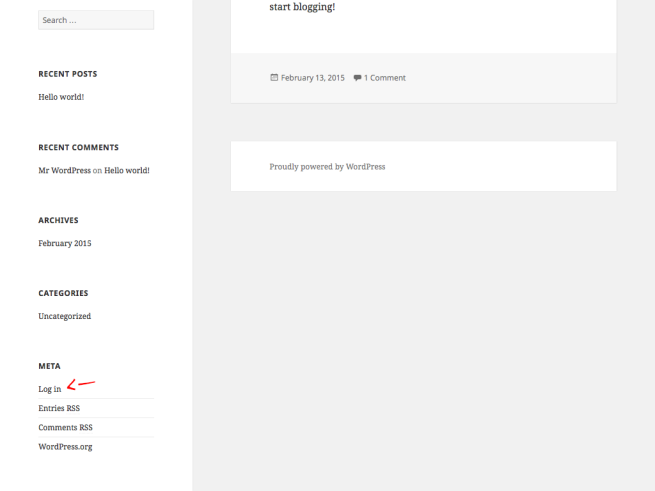
On your default theme, you should see a log in button near the bottom of your sidebar:
- This will take you to the administration panel’s log in page
- Enter your Username & Password and click the “Log In” button.
- Once you log in, you will be taken to the WordPress Administration Panel
- The Administration Panel provides access to the control features of your WordPress installation.
- On the left side of the screen is the main navigation menu detailing each of the administrative functions you can perform.
- The large area in the middle of the screen is the work area. It is here the specific information relating to a the particular navigation choice, such as adding a new post, is presented and collected.
See Also: http://codex.wordpress.org/Administration_Panels
For now, let’s start customizing the settings of our new WordPress site.
Step Two: Customize Your Settings
In the Settings Administration Panel you can adjust the settings which determine how your site behaves, how you interact with your site, and how the rest of the world interacts with your site.
1) General Settings
Go to Settings > General tab in your navigation:
The General Settings panel controls some of the most basic configuration settings for your site.
Here you can set your site’s title, location, who may register an account at your blog, and how dates and times are calculated and displayed.
See Also: http://codex.wordpress.org/Settings_General_SubPanel
2) Writing Settings
Use the Writing Settings to control the interface you use when writing new posts
The Writing Settings controls WordPress’s features in the Add Posts/Edit Posts, as well as the optional functions like Remote Publishing, Post via e-mail, and Update Services.
See Also: http://codex.wordpress.org/Settings_Writing_SubPanel
3) Reading Settings
The options in the Reading Settings are few in number, but still important.
You can decide if you want posts, or a “static” Page, displayed as your blog’s front (main) page. You can also adjust how many posts are displayed on that main page. In addition, you can adjust syndication feed features to determine how the information from your site is sent to a reader’s web browser or other applications.
See Also: http://codex.wordpress.org/Settings_Reading_SubPanel
3) Discussion Settings
The Discussion Settings allows you to set the options concerning comments (also called discussion).
It is here the administrator decides if comments are allowed, if pingbacks and trackbacks are acceptable, and what constitutes Comment Spam. On this SubPanel you also control the circumstances under which your blog sends you e-mail notification of certain events at your site.
See Also: http://codex.wordpress.org/Settings_Discussion_SubPanel
4) Media Settings
The Media Settings controls the various settings related to images and other media that are used in writing posts and pages.
The sizes determine the maximum dimensions in pixels to use when inserting an image into the body of a post.
See Also: http://codex.wordpress.org/Settings_Media_SubPanel
4) Permalinks Settings
The Permalink Settings offers you the ability to create a custom URL structure for your permalinks and archives.
This can improve the aesthetics, usability, and forward-compatibility of your links.
See Also: http://codex.wordpress.org/Settings_Permalinks_SubPanel
This portion of the Premium Design Works website is written by Mike Sinkula for the Web Design & Development students at Seattle Central College and the Human Centered Design & Engineering students at the University of Washington.


3 Comments:
Permalinks are the permanent URLs to your individual weblog posts, as well as categories and other lists of weblog postings. A permalink is what another weblogger will use to refer to your article (or section), or how you might send a link to your story in an e-mail message. Because others may link to your individual postings, the URL to that article shouldn’t change. Permalinks are intended to be permanent (valid for a long time).
Blogroll:
The blogroll is where you link to the blogs you read frequently – a friendly way of acknowledging the good blogs out there. WordPress’ built-in Links Manager allows you to add and manage links effortlessly
Trackbacks:
… [Trackback]
[…] Read More Infos here: sccc.premiumdw.com/web170/setting-up-customizing-wordpress-options/ […]