WEB170 » Uploading & Using Images in WordPress
What would any blog designed to keep your mother informed be without pictures? Luckily, uploading and displaying images is easy to do in WordPress as well.
WordPress makes it easy for you to add images to your WordPress site. You can upload them directly from within WordPress by using the built-in file uploading utility in the post screen.
— http://codex.wordpress.org/Using_Images
For this lecture, we will need a sample image file to work with. You can get your own image, or you can use my sample image.
Download: http://www.sccc.premiumdw.com/wp-content/uploads/2009/07/graduation.jpg
Note: I usually crop all of my images to a size of 1024 x 768 before uploading them to my site. You should do that too.
Using the Media Settings
Before we upload this image to our WordPress install, we will need to set up our media sizes by going to Settings > Media:
Let’s notice that there are Three default image sizes associated with WordPress:
- Thumbnail: Typically the size I use for my blog feed
- Medium: Typically the size I use when I want text to wrap around an image
- Large: Typically the size of the image that I want to be the length of the content column
See Also: http://codex.wordpress.org/Settings_Media_SubPanel
If you are wondering why I chose the sizes I did, you can see these sizes in action according to the 960 Grid System.
See Also: Demo | 960 Grid System
Once I upload an image, it will make the three sizes out of the original file.
Uploading Images
I am going to eventually add this photo to my about page, but let’s start out by uploading this to our media library by going to Media > Add New:
Once we have uploaded our image, we should see it in our Media > Library:
If we open the the image…
… we will see that we can edit the:
- Title: this will be written as the value of the “title” attribute in your image tag
- Caption: a “caption” can be associated and displayed with your image
- Alt Text: this will be written as the value of the “alt” attribute in your image tag
- Description: a “description” can be associated and displayed with your image
See Also: http://codex.wordpress.org/Using_Images#Styling_Images_in_WordPress
Interting Images into a Page or Posting
Now that we have uploaded an image let’s add this image to our about page.
Now that we are back in the Posts Edit SubPanel we need to click on the “Add Media” button:
Once we have clicked the upload/insert image icon, we will be brought to the “Insert Media” dialogue box:
You will see three options in this dialogue box:
- Upload Files: allows you to choose an image that is on your hard drive
- From URL: allows you to insert an image into your post via that image’s URL
- Media Library: allows you to choose an image that you have already uploaded
For now, we are going to stay on the “Media Library” tab and select the image we uploaded a few minutes ago.
Once you have selected the image from your media library, you will see the details for your image:
- Title: this will be written as the value of the “title” attribute in your image tag
- Caption: a “caption” can be associated and displayed with your image
- Description: a “description” can be associated and displayed with your image
- Link URL: you can set your image to link to the original image, the posting or any URL of your choosing
- Alignment: you can set your image to float left, float right or sit in the center via a class
- Size: you can choose the display size of your image when you insert it into your page or posting
See Also: http://codex.wordpress.org/Using_Images#Styling_Images_in_WordPress
Once you have set the details for your image, go ahead and click the “Insert into Post or Page” button.
Once you have clicked the “Insert into Post” button, you will see the image in your text editor:
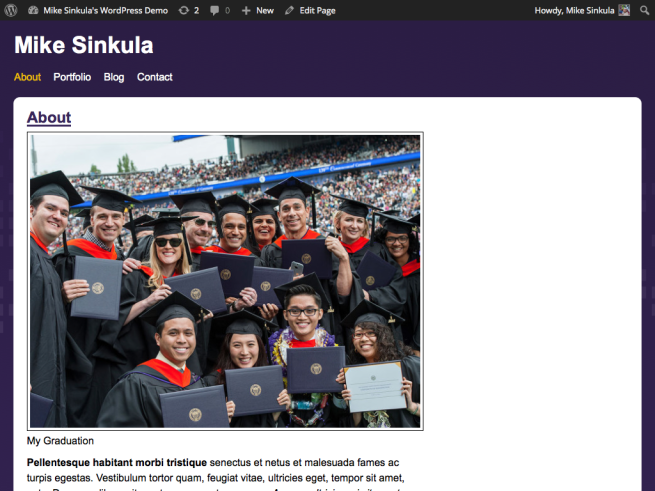
When you update your post, you will see this image on your web page:
Now your page has a “large” sized image!
This portion of the Premium Design Works website is written by Mike Sinkula for the Web Design & Development students at Seattle Central College and the Human Centered Design & Engineering students at the University of Washington.


1 Comment:
Trackbacks:
[…] are here and here; video is here. <– includes a prayer to Darwin at about 1:00:00, if that sounds […]